When you record videos while traveling, odds are you’ll end up with numerous short clips that range from being a couple of seconds to a few minutes long. Assuming you want to create a full-fledged travel video from those clips then one of the first things you’re going to have to do is join them together.
If you’ve never joined videos in the past that may sound a bit out of your league. Fortunately all you really need is Movavi Video Editor and you’ll be able to merge any video clips together in no time.
How to Join and Process Videos
To join videos using Movavi Video Editor is a walk in the park and you can just follow these steps to do so:
- Launch Movavi Video Editor.
- Click ‘Add Media Files’ then browse and select the videos that you want to join.
- All the videos you selected will be added to the ‘Timeline’ and you can drag them around so that they appear in the order you desire.
- When you’re satisfied, click ‘Export’ to save your video.
See how straightforward it is to join videos? If you want more complete instructions just head over to www.movavi.com/support/how-to/how-to-join-videos.html.
Aside from joining videos, you may also want to use Movavi Video Editor to trim out any parts of the video that aren’t required. By doing so you can remove footage that you don’t want included in your travel video and leave behind only the parts that you do want included instead. Also you could enhance the quality of the videos and fix common problems such as blurry, shaky or interlaced video segments.
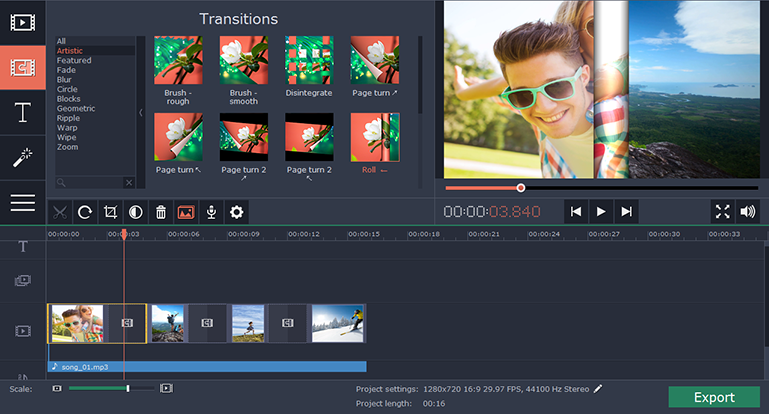
Give Your Travel Video Some Flair
By the time you’re done processing your video it should already be starting to resemble the travel video that you’re trying to create. After that all that is needed is to give it a bit of flair – which Movavi Video Editor can do quite easily too.
All you need to do is explore the features in Movavi Video Editor and start to experiment with them. As you begin to familiarize yourself with each of them you’ll discover that you’re able to apply special effects and filters, insert customizable text, add background music, include stylish animated transitions, and much more.
With a dash of creativity on your part, you should be able to apply these features to your travel video so that they bring out the best in it. At the end of the day there’s nothing quite like getting some hand’s on experience, which is why it would be a good idea to try out Movavi Video Editor for yourself as soon as you can.